Showing posts with label DIY. Show all posts

Friday, February 20, 2015

Painted Wicker Basket

We've had this wicker laundry basket for 7 years now and it has served us well. The cracks are starting to show but we're not ready to give up on it yet. I painted it recently so that I can still get a little more milage out of it.

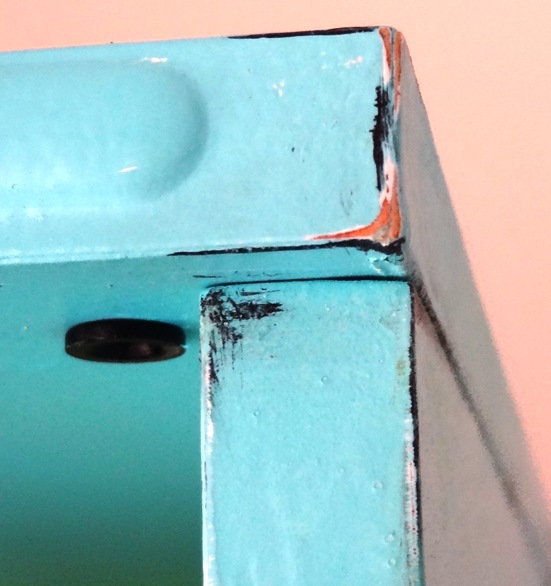
Because of the cracks in the wood, the spray paint couldn't give me a smooth finish. Also, the paint tends to drip over the rounded wooden segments so I had to make sure that the inside and outside colours match up.

I first cleaned it and let it dry for a full day. Then I first spray painted the inside in grey. I gave it an hour between each coat.

For the outside, I tried using masking tape to separate the colours, but because of the gap between the segments, colours tended to flow. So I just stuck to spraying from 4 inches away which gave me good enough control to not go (too much) over the line.

I've used white, metallic grey (on the inside and edges), and gold (which looks much like the original colour), and it is back in service.


Wednesday, December 17, 2014

'Tis the Season to be Jolly

I have been taking it easy and not really putting in any effort to make new cards or do much else. I had to snap out of that zone for an order of holiday cards in just a few days. I had some ideas in mind to make them that seemed easy and quick - but in reality, I could only squeeze in 3-4 cards per day. But they came out well, and I was happy with the results.


These cards were made from buttons and bows. Although the buttons were easy to stick to paper, the beads had to sewn. And to make sure the thread didn't unravel, I glued the line of stitch on the inside.


These tiny crystals were a boon - they come in a variety of colours and are easy to stick onto most surfaces. The Snowflakes seemed easy, but I was working with 4x4 inch origami paper which left me little room to manoeuvre. The key is to get the fold of the paper right - they are 6-sided.


Since I was short on time, I also revamped some of my earlier cards to make them seem a little more festive.


Ribbons and fabric borders make life much simpler. My Sakura metallic pens kept losing their sheen mid-way which was very annoying. I had to set them upright for a while before I could use them again to complete the card.


Finally, what's Christmas without the trees. The one on the left is made with cut-outs from some wrapping paper. The middle one is a cut-out from origami paper of 3 types of greens stuck together to make it 'come alive'. The last one is obviously glitter with Washi tape gift boxes.


These were fun to make, and now equipped with more variety of coloured card stock, I am looking for more designs I can put to paper.

Tuesday, November 4, 2014

Re-fashioned Top

I've had this light knit pullover for a while now and have barely worn it twice because it clings to all the wrong curves and it's neck is very deep. I, with my very limited sewing skills, decided to make it wearable by extending the width and length with some fabric. I figured even if I ruin it, it wasn't getting used anyway - all I'll lose is a the time spent.

The fabric I used for the extension panels was a small silk scarf that I've had for ages and had barely been used too.


First thing I did was cut off the bottom 2 inches and the sides till the arm pit. I also cut 2 strips of 3 inches each for the length of the sides. These strips were then pinned to the sides to keep them in place while stitching.


Mistake 1: Knit and silk are very difficult fabrics to work with, especially for a first timer. One keeps stretching and the other won't stay still! Even though I measured the exact length of the side from armpit to bottom and pinned the fabric so it would be in place, while sewing the knit fabric stretched so the strip didn't go all the way to the top. Thankfully I had started sewing from the bottom and it wasn't a big gap near the armpit so I could just close the remaining part without any extra material.

Mistake 2: I didn't realise that if I am not also extending the arm hole, the side extension will not be the same width top to bottom, rather a triangle of sorts.

Next, I cut 2 long strips for the extension at the bottom. The strip for the back was an inch longer than the one for the front. I also remembered to keep the strip longer so that even with the knit stretching, I will have enough to go around.

I used the edges of the scarf for these strips so that I would only need to hem one side which would not be seen from the outside. The sides would also need to be hemmed in so that it doesn't look shabby. These I attached to the bottom of the pullover.

That took care of the length and width of the top. Next was the deep neck. I looked at different options like ribbons or a strip of the same fabric tucked behind the neckline, but they didn't look very convincing. I finally settled for small rosettes which are super easy to make.

The sleeves I shortened and left unfinished. The knit just rolls up at the edges so you don't see a frayed line.

Here's the finished product.
Although it is nice to wear something you've made, it was too much of a hassle and it was't as neat as I would've liked. If I can find a tailor to do this, I would hand it over without a second thought.

Tuesday, October 21, 2014

Thoughts on Weddings

Weddings are amazing! No matter how cynical the world seems to get, and how much ever the ceremony is derided as just a piece of paper, it has not lost its popularity.

We just returned from my sister's beautiful wedding ceremony and it was all we had hoped it would be. It was classy, filled with love and happiness, and the families got to know each other sharing laughs and stories.

Theirs was a story with a happily ever after, but once the wedding fever has died down and you get your heads out of the clouds, there are too many who reminisce about the happy days pre-wedding. The only people who cannot think of going back to those days are those who are over dependent on their partner (financially, socially, or at home), and those who married the right person for the right reasons at the right time!

You wouldn't want to be so dependent on someone that you cannot function without them, but oh to be in a great marriage! You cannot imagine a future without your partner, but you know that you don't need them to fulfil a purpose. You just want them around.


There are people who marry because they were turning 30, because it was expected, because they have always dreamed of a wedding, or they wanted someone to look after them. However, I also know of people who marry because they've been great friends who fell in love, because they just knew for certain that they were the right fit, and because they couldn't imagine being so comfortable and in love with anyone else.

I am blessed to fall in the latter category, and from what I observe, my sisters do as well. Shouldn't everybody?


With everyone trying to one-up their acquaintances on social media, wedding are becoming more extravagant, sometimes ridiculously so. There are many who look forward their entire lives to a perfect wedding and never give a thought of the marriage that comes after.

A wedding is a celebration of love and a meeting of families and friends. It is such a private and happy affair with people on both sides getting to know one another that you really don't need any unnecessary showbiz to distract from it.


Of course, that doesn't mean you have a zero-expense wedding. It just means you don't lose focus of the purpose of the event. There is no need to blow your entire savings on a single party, or to invite people out of obligation. I hear many couples complain that they never got to enjoy their own wedding or taste the food. I find it ridiculous that you would make what is to be the happiest day of your life into such a chore.


After all is said and done, looking back through your wedding and post-marriage albums and pictures, you should not be left with a single regret. Look forward to making more of such happy memories for years to come!

Friday, December 20, 2013

Cake Box

Recently I had to take a home-baked cake to someone's home and hadn't yet invested in a cake carrier.

I have previously resorted to making cupcakes or brownies instead, but I wanted to try making a cake box - it couldn't be more difficult than making the actual cake, could it? It wasn't.

I found a helpful guide on how to go about making a box instead of just winging it (Crystal's Creative Creations). Tip: It makes life a lot simpler if you use a cutter to score the card before folding it. I tried folding the first line without it and it didn't some out clean.

The only changes I made was to go with a fully-covered top with some drawings instead of the clear film, and since the card paper I got wasn't very thick, I trimmed the cardboard base covering the whole base instead of circular.

I drew over the top sheet after marking the folds, but before sticking them into place, and I lined the cardboard base with aluminium foil - some fancy foil would have looked looked but I didn't have any.

The box and cake were highly appreciated. Recipe for cake.


Sunday, September 29, 2013

Antler Project

Deer shed their antlers or lose them in territorial fights so it is quite common to find one lying around where there are herds of them.

This particular one had been at my parents' home for a decade and when I brought it home I felt that the natural tone just blended in and wasn't noticeable. It needed some punch. After a quick browsing of colour palettes, I settled on Payne's grey, magenta, and gold in acrylic. I found bottled colours easier to apply than spray paint. 

I used masking tape to demarcate the colours but because of the ridges on the antler there were small gaps because of which some colour leaked through. Don't worry too much. After the paint dries, just touch up the lines with a fine brush. I used 3 to 4 coats of paint. Remember to wait overnight for the paint to dry before removing the tape and applying it to another painted area.

Thursday, July 11, 2013

Things to do on a Rainy Day - Painted Ceramics

I had been wanting to learn pottery for a while now, but as soon as I could find the time, the pottery class went under renovation. I found the next best thing though - ceramic painting.

A hobby store - Hobby Ideas - has pre-formed ceramic items that you can paint. Once you're done colouring, they bake it for you. 

I picked up 2 coffee mugs to paint (for Rs. 800 each that includes clolours and baking). I choose coffee mugs on the basis of their handles, and this one was comfortable to hold. But I didn't have time to sit in-store to complete my project so I took it home along with some ceramic paint.

At home, I realised that if I had planned my design in advance, I would have a better selection of colours instead of the random ones I picked up. But I made do with what I had. 

For the yellow mug, I outlined the design with a pencil, but it was hard to blend the lines in with colour. So the blue one which I did next was completely freehand. I painted two coats of colour hoping to avoid brush marks, but it didn't help much. The finished colouring is much deeper that it was pre-baking.

They say that these hand-painted items shouldn't be washed in a dishwasher, but I did and the colour seems to hold fine.

My mornings with my coffee just got brighter!

Sunday, April 14, 2013

All you need is love

Finally made a coloured Zentangle and moved on from the small squares. Rummy and Bing make an appearance as well.

UPDATE: Framed at it's new home!

Sunday, November 4, 2012

The Painted Laminated Cabinet

I was skeptical painting over laminate, but after priming a corner, I believed it was going to be OK. I didn't even bother sanding it down. Up went two coats of primer and 2 coats of paint. The distressed look - done with acrylic paint this time - didn't turn out perfect. But it's not too bad.

Here's the before:
and after:


The room looks a brighter and happier place. The paint is holding up, although there were a few scratches while putting the shelves back together again.

Monday, October 15, 2012

The Painted Table

Most of the furniture in our home is solid wood. I like natural wood finishes but in a small space, it becomes too dull to just see shades of brown everywhere. So, they're all getting painted!

The study table was the first actual paint project. (The wicker seats don't count because, well, a 2 year old can use a can of spray paint.) I don't have a 'before' picture as Husband got excited and started sanding the thing before I could take one. Here's an image I got from the net - it kinda looks like what we had, but with drawers.

It took us about 2 hours to sand the whole thing with a medium grit (120) sandpaper just enough so that the varnish was scraped. Then came the wood primer mixed with a bit of turpentine so that it is easier to spread. We used paint brushes to get some texture on the wood - I didn't want it too smooth since I was going for the distressed look, which was why we didn't sand the table very evenly. We gave it about 8 hours to dry before the 2nd coat. We barely used half a litre of primer with 200ml of turpentine.

Then the painting started after another 8  hours. We used light teal. It's a beautiful and bright color that would've looked even better with a better wall colour. But for now, the dirty cream is what we're stuck with. Husband was insisting we use a putty to smoothen out the roughness, but like I said, I wanted some texture, and that's what we stuck to. It took us two coats of paint, with each coat drying for about 8 hours. (The paint was also diluted in turpentine. We had to get 1 litre of paint as that is the minimum size being sold, so we have with a lot leftover.)

The drawers were painted bright yellow. This paint was the 'signboard yellow' easily available in small amounts and I didn't have to mix any thinner. I just made sure I mixed it well in the can as the bulk of the pigment settles at the bottom of the container. I used scotch tape around the edges to catch the paint and had to do 3 coats. Husband got some new hardware as well, to go with the new look.
Finally, using the same sandpaper, I roughed up the edges a little. It gives the table some character I think. I had a can of PU finish which I sprayed on top for some protection. I don't think it was absolutely necessary, but since I had it I thought 'Eh! Why not?'.
Now, with the leftover paint we shall start the next piece of furniture - a laminated cabinet in the same room.

Saturday, October 6, 2012

Easy paint job

This month is paint month. I started with the easiest of the lot - wicker seats. The polish had worn off long ago and it was looking quite a junk yard piece. So a can of spray to the rescue.

I didn't need to sand or prime the surface. I just washed the seats with a water spray and let it dry for 2 days. Then just spray painted the whole thing. It dried up in a few hours but I kept it out to dry for 2 days just to be sure. I didn't want a dramatic change of colour - wanted to keep it light. Just make sure surrounding surfaces are covered with paper before spraying and the area is well ventilated.

Here's the before/after. Like I said, not a drastic change in colour, but it looks fresh and almost new.


Next up, study table. That's gonna take a bit of sanding. Not looking forward to that bit.